Panning Technique
I was asked to do a short presentation on panning at my camera club this week. I thought it might be of interest to those who missed it and anyone interested in a few tips and tricks.
What is Panning?
It’s basically intentional camera movement while tracking a moving target/subject.
It is often used in conjunction with slower shutter speeds in order to depict a subject’s movement. Picture a car in the middle of the road. If I shoot it at 1/2000 sec it appears completely static, how do I know if it was moving or parked? Use a slower shutter speed and introduce some movement blur into the shot.
Things to bear in mind
- Lens choice; the longer the lens, the more effect moving it will have (and the harder it is to do)
- Absolute Speed v Relative Speed. A slower speed can appear faster than a fast speed depending on how close it is to the camera. Picture a runner who might take less than a second to traverse your field of view when only 3 feet from the camera, while a jet travelling at 300mph might take several seconds to traverse the same field of view when it’s 400 yards away.
- the relative speed of the subject will be greatest at 90 degrees to the camera. A subject coming straight at the camera or away from it has no relative movement, it just gets bigger or smaller in the frame.
- The longer the lens, the more support you’ll need. Handholding without support might be OK on a 75mm lens but almost impossible on a 600. I prefer a monopod on anything 300 plus.
- Don’t use the rear screen to take the shot – always use the eye viewfinder; the subject is larger in the view and it will be easier to track it.
Camera Settings
- I prefer Manual Mode on my camera, that way I choose the ISO, Aperture and Shutter Speed, but if you want to use one of the other modes, try TV (shutter priority).
- The lower the shutter speed the more movement blur you’ll get, but the more difficult it is
- Continuous Focus is essential, you are tracking a moving subject so your camera needs to focus on it constantly.
- High Speed Continuous Shooting. I have my camera on this 100% of the time whatever I am shooting (I use back-button focus), although I rarely ‘machine gun’ the shutter, it can be useful to take several shots as the subject passes giving you more chance that at least one is in focus.
- A slower shutter speed equals a smaller aperture and a smaller aperture increases the visibility of dust on your sensor; you might be shocked how dirty it is.
- I prefer to use a single focus point. I will often move that one focus point to somewhere other than the usual centre, in order to compose how I want the final image to be. i.e I will focus on the shoulder or head but I might want the head to be in the top right of the final image, so I’ll select a focus point nearer the top right.
The first shot below is quite good, there are only a couple of dust spots and a single hair, the second shot is somewhat different (changing lenses over 3 days in a windy airbase causes this)
As for technique, it’s important you have a solid stance. Bear in mind that the bigger the lens the more support you need, whether that’s wedging your elbows into your sides, supporting the lend by holding it underneath, using a monopod.
Plant your feet shoulder width apart facing the point you intend to press the shutter. If that’s where you want to see maximum movement blur then that will be ninety degrees to the target. If you want t a shot of the vehicle (for instance) 3/4 on then face that position.
Then wind your hips in the direction the car will come from, pick it up in the viewfinder, focus on it all the way until it reaches your shutter press position.
When your hips are ‘unwound’ press the shutter, take the pic (or several if you wish) but then wind your hips in the opposite direction and keep tracking the vehicle as it drives away.
It is important that you follow three phases
- focus and follow as it approaches
- take the shot/s
- focus and follow as it leaves
this way you will get the smoothest panning action and if it is really smooth you’ll get a great shot with lots of movement.
My usual technique, whether I’m at a cycling meet or a racetrack, is to spend a few laps getting my eye in and getting some “banker” shots. These are shots that are taken at higher shutter speeds. Once I’ve got enough, I’ll then get a bit more creative and gradually reduce my shutter speed. As I go slower and slower I’ll take it down as far as I can while still getting a fairly good proportion of successes (shots where the point of focus is still sharp but with lots of movement blur in the background).
Below is one of my banker shots of Jonny Peacock winning the 100m at the London Olympics, shot at 1/200sec.

Once I got some shots of other races at faster shutter speeds I began to reduce the shutter speed.
Below is a series of one of the blind races. You can see that some shots were more successfully panned than others but in the whole series of18 shots, there are a couple of keepers.
Check out the shutter speeds for the first three shots below. They are all exposed correctly. The first is 1/8000sec, the second 1/1400 and the third 1/90.
There is little difference between the first two, the spokes are frozen, the only real difference is the depths of field. Check the tree in the background of the first two shots, the first is f1.2, the second f2.8.
Once the banker shots are in, I gradually reduced the shutter speed. Compare the movement between the first and last shots.
Here’s another set of cycle shots.
The banker shot is 1/1000sec then the others gradually come down until I get to 1/80sec, 1/50sec and 1/45sec.
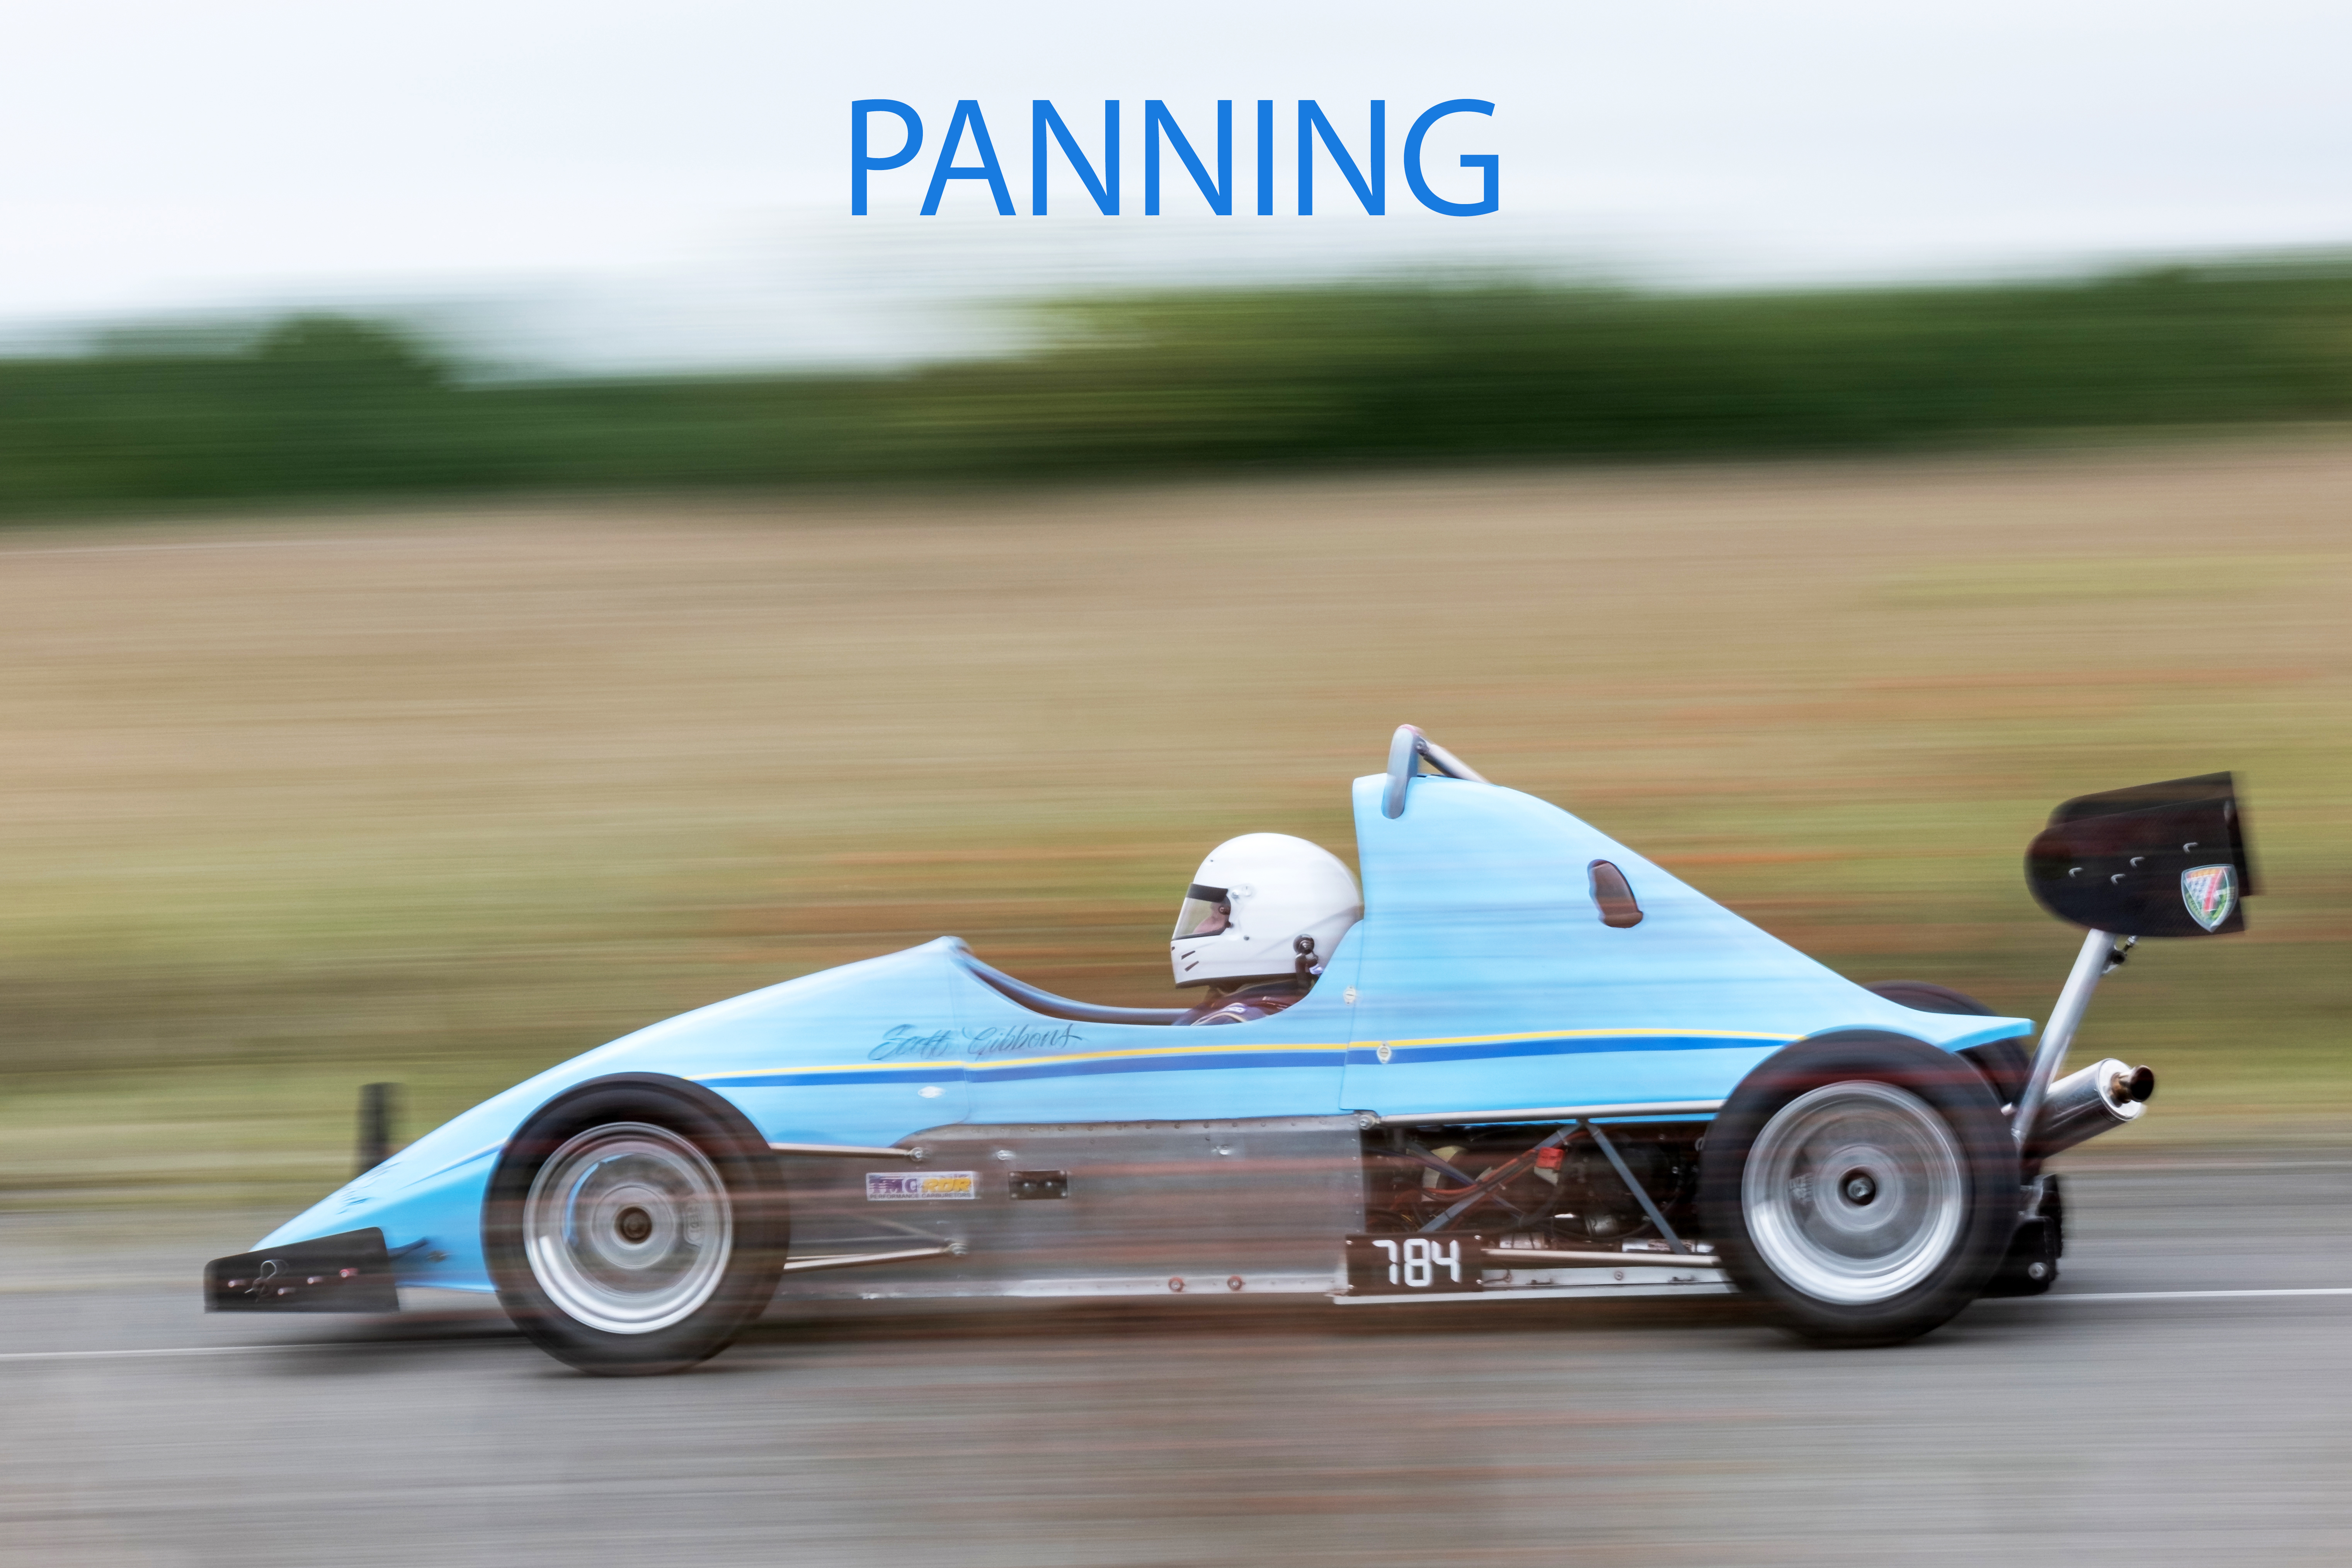
Now we have some motor racing.
These shots are from some time trials at Debden Aerodrome near Saffron Walden.
These were taken on a recently acquired Fuji X-T5 in October 2023.
Some might think I’ve gone too far but I quite like the effect on super slow shutter speeds.
Note the first time Blue 7 came round I used 1/74sec, the next time in a different part of the track I tried 1/35
Finally I have some F1 practice at Silverstone way back in 2008.
These may not be everyone’s cup of tea but, as I said earlier, I really enjoy the arty, ethereal effect on the ridiculously slow shutter speeds. I’ve taken well over a million sports shots since I got my first DSLR in 2008 and the shot of Fernando Alonso in his Renault on a 500mm lens taken at 1/5 of a second, is one of the favourite pics I’ve ever taken.
I hope you found this useful.
Whenever you get the chance to photograph something that’s not nailed to the floor, why not try some panning?
Anyone that has roads in their town can practice. Find somewhere you are back from the road, maybe at a junction or sideroad. I’ve used a local Tesco car park which looks down onto a large busy roundabout.
If I get a new lens, I’ll take it over the town where we have a big long-about. I can stand in the middle of it and track cars as they drive round and the drivers won’t see me shooting them as they concentrate on looking ahead and not 40 yards to their far right.
I hope this helps and if you have any comments or questions, let me know and I’ll do my best to help.
Have fun.